Saturday, April 23, 2016

EZ Dresden Challenge Quilt

UPDATE:
Since I am still getting requests based from this post, for a pattern, here is a link to my blog post in January 2014, with the tutorial !
http://claddaghsquiltsandstars.blogspot.com/2014/02/maltese-cross-dresden-block-tutorial.html?m=1
Enjoy!


Here is my EZ Dresden Challenge Quilt!
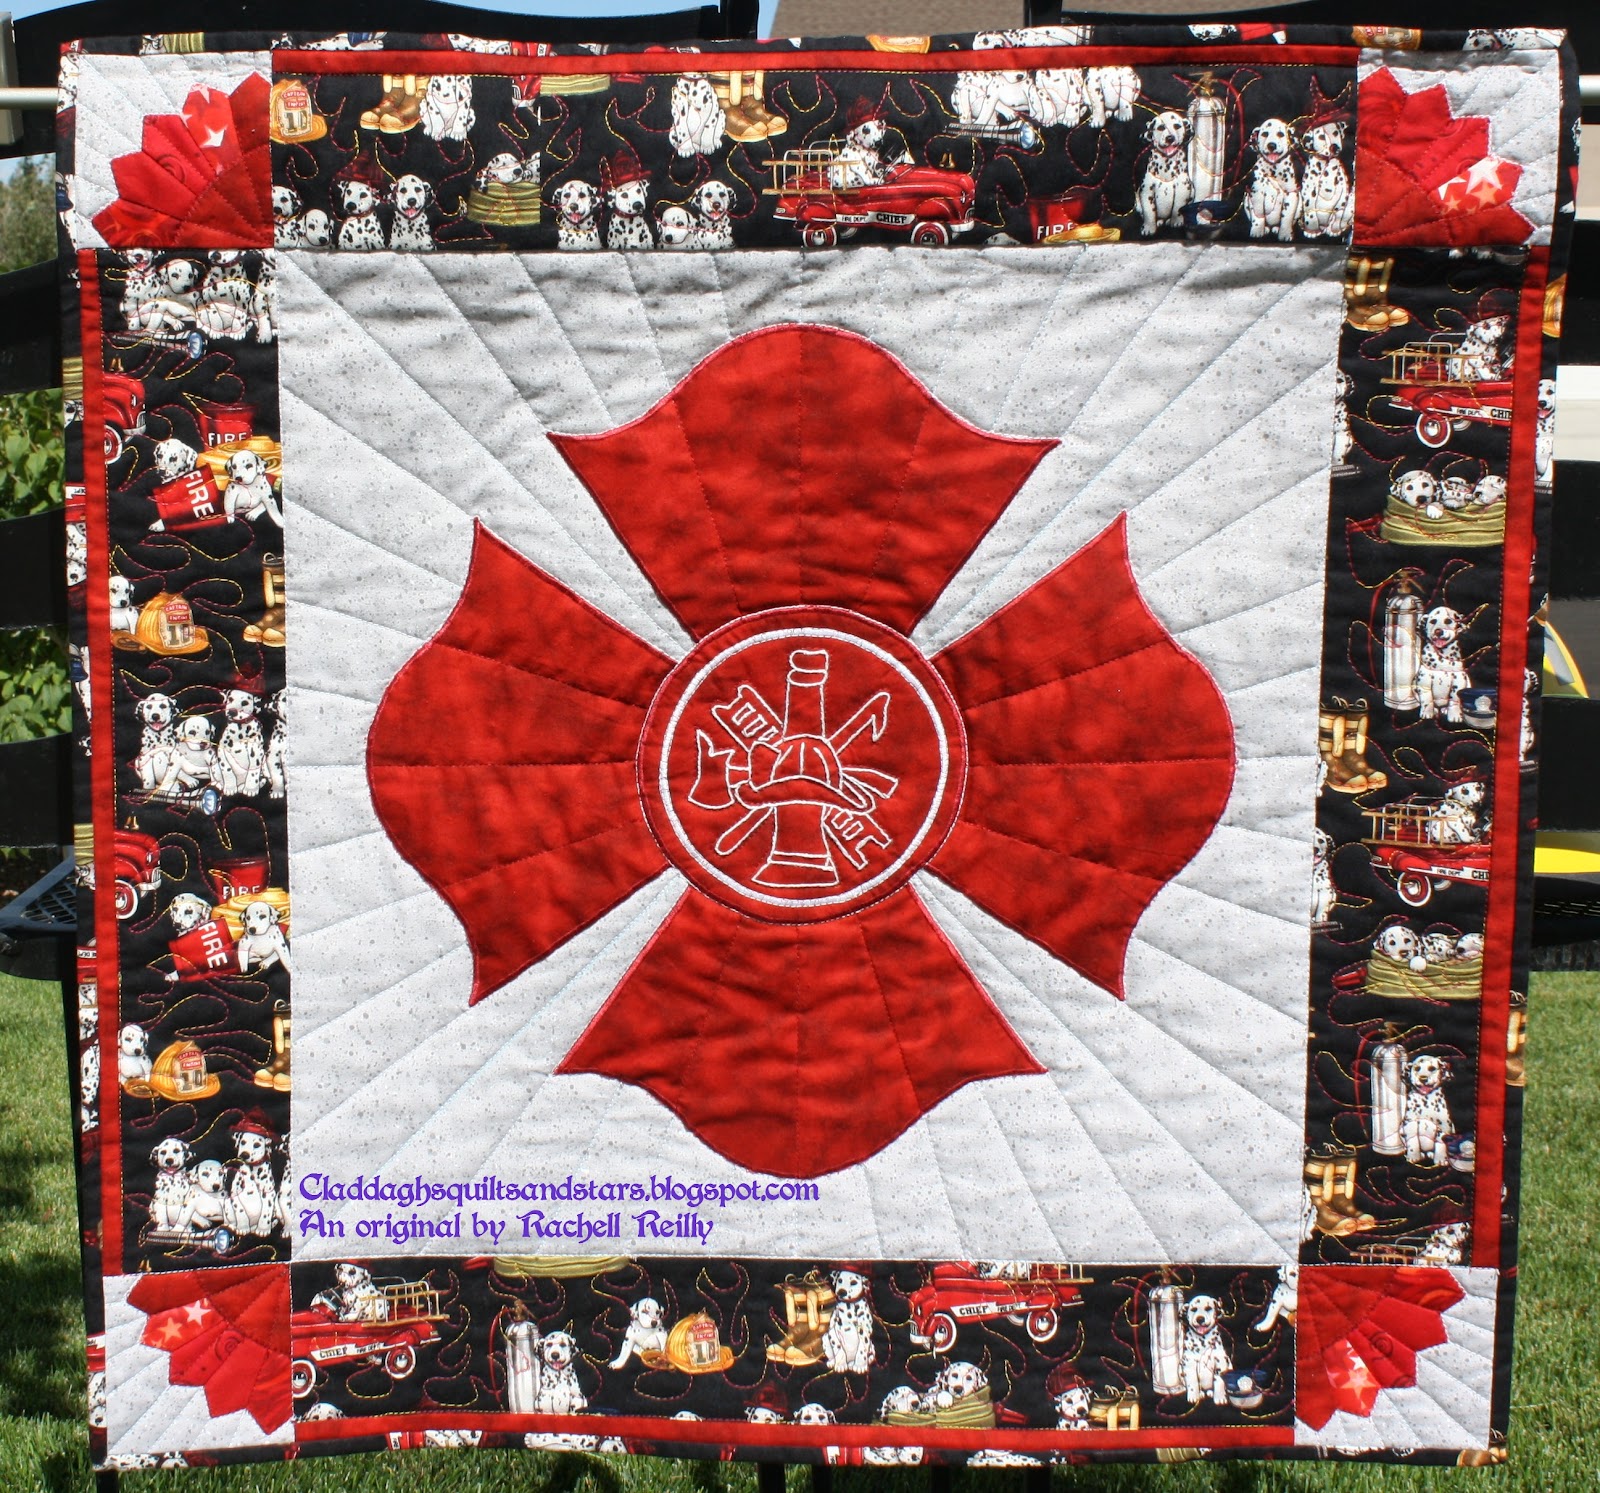
"Maltese Dresden"

It is 24" x 24" square quilt.
I call it my "Maltese Dresden" because it is the Maltese Cross, the symbol of American firefighters.
I used Robert Kaufman's "Marbleous" in Red for the main cross and fans and border, Robert Kaufman's "American Heroes" dalmation/firefighter print for the borders and backing, and random fat quarters for the fans.
Yes, I did use the EZ Dresden ruler to cut the Dresden blades!
I used Sue Pelland's "Leaves Galore" template ruler to help me cut those beautiful curves on the Dresden Plate blade units. I just left one blade out per quarter unit of the plate (16 total instead of 20).
I hand-embroidered the "scramble" in the center circle of the cross. The "scramble" consists of the helmet, axe, Halligan bar, ladder, and bugle. 
This is my husband's fire helmet; I thought it was very appropriate to stage it with the quilt because it is a quilt for my husband, the firefighter and paramedic.
I'm so very grateful I found this challenge, because it enabled me to dream up and design a quilt block with the Maltese Cross, which I have been struggling to do for quite a while.
I really felt like this deserved to be in the "Innovative" category. But by the time the design came together in my head, and I started with the mini quilt for the experimental phase and got that finished, I didn't have enough time or enough red Marbleous to do the required 50" size for Innovative.


If you want some more history of the Maltese Cross, and how it became the symbol of the firefighter, check out these links:


Now that I'm done with the challenge quilt, I'm going to use my design to create a twin-sized version, medallion-style, for my husband to take to the fire station with him, for his bed there. After all, he sleeps two nights a week there! I'm going to need a lot more of the "Marbleous!" in red to make it, though, so I need help finding some. :-)

Friday, April 8, 2016

Better binding with presser foot

I tried something new for binding the star sampler. I used the #71 foot, the Bernina Flat-Fell Foot.


I haven't been very happy with the results of doing the binding by machine. Yes, it's quicker, but there's too much of a flap left over on the back when stitching in the ditch, and the binding doesn't finish at a nice, even width on the back. I enjoy sewing the binding to the back by hand, but it's slower than it used to be for me, and sometimes torturous, with my tendinitis now.

I searched for any more ideas. And I found an awesome tutorial by A Woman a Day, using her Bernina Flat-Fell Foot. She used the #71, which is the wider foot (like 8 mm wide), and cut her binding strips 2" wide.

https://awomanaday.com/2013/01/17/happy-feet-quilt-binding-edition/


Even better--almost no pinning or clipping!

I'm very happy with the results ! It's a little hard to tell with the black binding and the matching black thread, but the binding width is even all the way around the quilt, and perfectly centered width-wise on front and back.


A few things I learned, on top of the advice from Lisa's tutorial:

1--It's slower than using a walking foot, and without the walking capabilities, I had to increase the stitch length a bit more than the preset, and also work a bit harder to help all the layers move through the feed dogs.

2--Have a matching thread to the quilt when working on the front. However, it's important to have a thread matching the binding while on the back.

3-- When working on the back, while securing the binding to the back, corners get a bit tricky. When you are approaching the corners, get as close as you can--less than an inch. Then fold up the miter, and pin the mitered binding in place on the adjacent side that you're approaching. Then lower your needle into the quilt and binding, and remove the binding from the foot. Use a stiletto or fingers, and lower the foot on top of all the layers, and sew the binding to the corner. Back stitch to the edge of the adjacent side, and pivot 90 degrees to meet it. Back stitch again and sew forward a few stitches. Then lift the foot, place the binding back over the foot and into the foot roll, and continue the binding.
Repeat for each corner.


Look at that, even-width binding on the front and back. It's so pretty!

If you can tell, I also used the flat-fell foot to piece together the hanging sleeve. That way, a curtain rod or dowel won't get caught up in the seams of the sleeve, and will slide through the sleeve easily.

I love my Bernina and the high-quality presser feet. There are a lot of feet to help you do just about any sewing technique easier!

Thursday, April 7, 2016

Finish--Star Sampler

Hi !
I'm embarrassed by how long it's been since I posted. I'm not even going to peek to see how long! I guess it's been easier to post quick updates on my Facebook page.

Here we go: my baby's star sampler is finished! Although he is a toddler and in a toddler bed, the bed still uses a crib mattress, so crib-sized is great. I like crib sizes to be about 44x60", slightly rectangular. (I also happen to think 45x60 is a great adult lap size.) My older boys still use their crib star samplers on their beds and are very attached to them.


Don't you just love how the light illuminates through the yellows and silvers and the star patterns, almost like stained glass?!!

Stats:
Connor's Winter Stars or Connor's Winter Starflakes. (Please vote!)
44 x 60"
12-12" star blocks with 2" sashing in a 3x4 layout.
Fabrics: Michael Miller Fair Frost in Gold, Black Diamonds, Silver, pale yellow; medium yellow blender from Cranston Village.
Backing: a strip of "made fabric" or "crumbs" leftover from paper-piecing the blocks. Snowflakes print from: "S'Noel" by Dana Brooks of Lazy Daisy Cottage for Henry Glass.
Blocks top L to Rt: Little Lone Star, Crossed Diamonds from Quiltmaker's 100 Blocks collection, Starshine from Quilterscache.com, Star in the Window, Turning Star by Quilterscache, Dogtooth Violet by Jennifer Chiaverini, Folded Star from QuiltersCache, Amish Star, Mariners Compass by Jennifer Chiaverini, Silver and Gold, Morning Star, and Liberty Star from Jennifer Chiaverini.


I love using the Amish Star for an album or label block. This time, I decided to try embroidering the baby's name with my new embroidery machine.

I used several techniques for quilting. I like to mix it up. Whatever it takes to create my vision!
--The dreaming man in the moon, and the snowflakes, I copied by hand on tracing paper. Then I stitched FMQ through the paper.
--I used mostly dot-to-dot geometric filler shapes.
--I used my embroidery machine to quilt some of the snowflakes in corner squares and centers. And to embroider my son's name.
--used the walking foot quite a bit, and not just for stabilizing and SID (Stitch in Ditch).

And it still needs a label! I'm trying to figure out my embroidery machine's editing software.